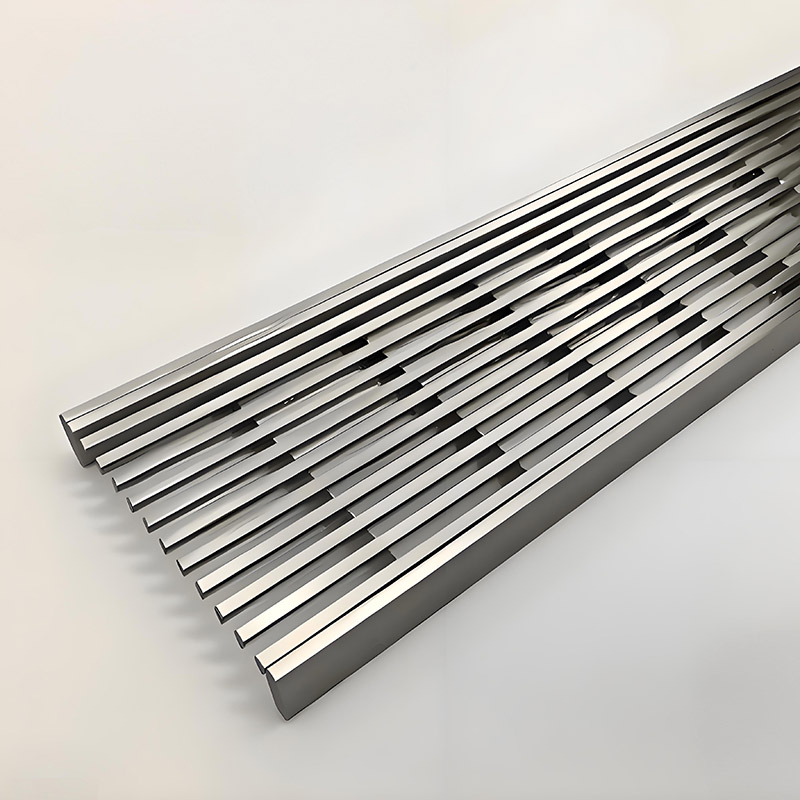
How to install a bathroom linear shower drain

How to Install a Bathroom Linear Shower Drain
Installing a bathroom linear shower drain is a smart and modern choice for enhancing both the functionality and visual appeal of your shower space. Whether you're planning a new bathroom build or renovating an existing one, understanding the proper installation steps and avoiding common mistakes is essential to achieving a sleek, durable, and water-efficient shower area. This guide will walk you through choosing the right size—like a 36 linear shower drain or 60 inch linear shower drain—and how to install it step-by-step.
Common Sizes of Stainless Steel Linear Shower Drains
Stainless steel linear shower drains come in a wide variety of lengths to suit different bathroom layouts and user preferences. Some of the most common sizes include:
-
24 inch linear shower drain – Ideal for compact bathrooms or shower stalls.
-
36 linear shower drain – A popular mid-range option that balances space and drainage efficiency.
-
48 inch linear shower drain – Suitable for medium-sized walk-in showers.
-
60 inch linear shower drain – Best for large, luxurious showers or barrier-free bathroom designs.
-
Custom lengths – For special installations requiring precise dimensions.
When selecting the size of your bathroom linear shower drain, consider the width of your shower area, the placement of the drain (centered or wall-adjacent), and the desired flow capacity. A 60 inch linear shower drain offers a bold, continuous look and maximum drainage, while a 36 linear shower drain is more compact but still effective for most residential showers.
How to Choose the Right Linear Drain Size for Your Bathroom
Choosing the correct size is more than just measuring your shower. Here are key factors to consider:
-
Shower Dimensions: The drain should span most of the shower width but not exceed it. Leave 1-2 inches of clearance on each end.
-
Drain Placement: A wall-side drain might require a shorter length than a central one.
-
Slope and Floor Type: Your flooring must slope consistently toward the drain. Longer drains often make this easier.
-
Design Preferences: A longer drain gives a more luxurious, spa-like appearance.
Step-by-Step Installation Guide for a Bathroom Linear Shower Drain
Installing a bathroom linear shower drain is a manageable DIY project if you have some plumbing and tiling experience. Here’s how to do it:
Step 1: Plan the Layout
Decide on the drain position—along the wall or in the center. Ensure your shower floor will slope consistently toward this location.
Step 2: Prepare the Subfloor
Remove any old flooring and clean the area. Ensure the surface is level and structurally sound.
Step 3: Set the Drain Body
Position the stainless steel drain body into place. Most 36 linear shower drain or 60 inch linear shower drain models come with adjustable legs and leveling feet. Connect it to the existing plumbing, ensuring a watertight fit.
Step 4: Create a Proper Slope
Use a mortar bed to create a slope toward the drain (about 1/4 inch per foot). This is crucial for proper drainage.
Step 5: Waterproof the Area
Apply a waterproof membrane over the floor and walls, integrating it with the drain’s flange. Many modern drains are designed to work with fabric or liquid waterproofing systems.
Step 6: Tile the Floor
Install tiles over the waterproofing layer, starting from the drain and working outward. Be careful around the drain edges for a neat finish.
Step 7: Install the Grate Cover
Once the tiles are set, place the stainless steel grate into the drain body. Ensure it sits flush with the tile surface.
Common Installation Mistakes and How to Avoid Them
Avoiding these common pitfalls can save you time and money:
-
Incorrect Slope: Without proper slope, water will pool or drain inefficiently.
-
Wrong Drain Size: A drain that’s too long or too short won’t fit properly or may cause tiling issues.
-
Poor Waterproofing: Skipping or rushing this step can lead to serious leaks.
-
Improper Alignment: Misaligned drains may affect aesthetics and functionality.
-
Loose Grate: Not securing the grate properly can make it shift or rattle over time.
Final Thoughts
A bathroom linear shower drain is both a stylish and practical upgrade to any modern bathroom. By carefully selecting the right size—such as a 36 linear shower drain for mid-size spaces or a 60 inch linear shower drain for large showers—and following the proper installation techniques, you’ll ensure a long-lasting, beautiful result. Avoid common errors, take your time during installation, and enjoy the sleek, seamless look and improved drainage performance of your new stainless steel linear shower drain.
Advantages and disadvantages of linear shower floor drains in bathroom